The Challenge – Using Repurposed Timber Framed Barns

RDS_blog_Repurposed-Barns.jpg

Ever have a challenge you can’t refuse? Our client wanted to develop a family retreat and as we began the design process, he came to us with an unusual challenge: to find a way to use two repurposed timber framed barns in the designs. Of course, we were excited about this request!

The smaller of the two timber frames is the cabin, which actually offered more challenges. The horizontal beams fell into some of the head room of the spaces, so we removed some and worked around the others that we were able to keep. 

The larger structure will be the main shared living space. It is built around a very unique gambrel roofed timber frame, which you don’t often see in Ohio. The frame becomes the core of the building and then “tractor shed” additions are added to the sides. One side becomes a bedroom suite, and the opposite is a screened porch, large enough to accommodate all the family at the same time.

The photos of the barn as it was being dismantled show the age and complexity we were working with.

Both timber frames were located and will be erected by Doug Morgan of Mount Vernon Barn Company, whose vision is to save and repurpose one hundred year old barns. I think they are well on their way!

Rendering credit goes to Derrick Davis of Davis Rogers Interiors.


A Walk to the Gazebo

18RDS_blog_-Gazebo copy 2.jpeg

At RDS, not only do we design houses, we design outdoor spaces. This amazing project came about as a continuation of work done by a landscape professional. The owners wanted to access the pool and pool house via a covered walkway from their study, which is mid-level between the first and second floor. 

Highlights:

  • Created an outdoor room as a gazebo feature as a halfway point in the height transition to allow spaces to flow naturally
  • Installed an illuminated lantern and LED up lighting inside the gazebo so that it glows in the evening
  • Built a bridge on the lower covered walkway over the stream with a glass floor panel to walk across, providing a view of the stream

Construction was handled by Mark Cimenello of Cimenello’s Landscaping. Finishes and color selections were by Derrick Davis and Deana Rogers of Davis Rogers Interiors.

Do you have an outside room project you have been thinking about starting? Our designers here at RDS would love to work to create the perfect outdoor space for you. Contact us so we can make your dream a reality!

Updating the Lower Level

19RDS_blog_-Griffey-contemporary-basement copy.jpeg

Our clients came to us with a problem many home owners face – how to make a lower level space updated and contemporary. They had several issues we had to address and we were able to create effective, yet contemporary changes to make this an incredible space.

Goals:

  • Turn the stairs into a straight run
  • Add a wine cellar as a visual part of the room
  • Add a large bar and entertainment area that flows to the outdoor living area
  • Create a full theatre room 
  • Embrace a contemporary aesthetic

Highlights of Our Design:

  • Relocated several plumbing lines and a water heater
  • Reframed the stairs and new trim, flooring, and finishes
  • Installed a replacement door system for better operation and weather sealing
  • Removed the existing stair landing and replaces with a straight run built with glass treads illuminated from beneath
  • Wine cellar is a series of commercial glass doors allowing a view of the entire collection 
  • Large island was wrapped in a waterfall of marble in a bold green and black 

The builder for this contemporary space was Charlie Griffey of Griffey Remodeling.

Our designers at RDS can work with you to renovate or remodel any room in your home to make it whatever you dream it should be. Let’s get the conversation started and the project underway!

What Our Clients Have to Say - A long term client

2RDS_blog_Sandy-B-Client-Testimonial copy.jpg

At RDS, we believe that designing a home is one of the most satisfying parts of our work. We love building relationships with our clients, and working with them to bring their dreams to reality. We want you to get an idea of what our clients think of their experience working with us. 

What was your experience with RDS – Residential Designed Solutions?
It was a good experience. The designs were creative and the designers were responsive to my requests. He worked hard to stay within our budget.

What space(s) did you have redesigned, (if applicable) or did you have a new home designed?
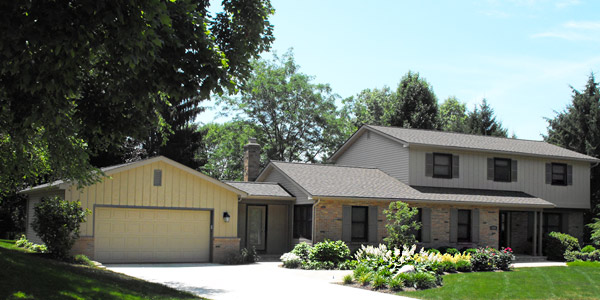
We expanded our family room, laundry room and storage closet using the existing garage. We built a new, oversized 2-car garage. We needed more space and thought about enclosing our porch and making it a 4-season room. But it was less money to use the existing garage and build a new garage.

What is the favorite aspect of your new home design?
It blended perfectly with existing house and did not appear to be an addition. The bricks match on the front of the home. We did change the windows so that they are all on the same line. Due to our builder’s expertise, all of the floors and woodwork match in the home.

If you could change one thing, what would you change?
There is nothing I would change.

What was your overall experience like?
It was an overall excellent experience. We are thrilled with the look of the home. Anyone looking at it wouldn’t even know that we did anything to the home. That was important to me. Jim and I have similar ideas, which made it easy to work with him. He was able to advise me with how to get the best bang for my buck. 

What advice would you offer to someone who is designing a home or redesigning a space in the home?
Take your time and revisit the plan several times before you finalize the plan.

Who else did you reach out to for designing your home?
No one.

Would you do it again?
Yes! Jim is actually helping us design our new home. We have a great partnership. Jim is very responsive. He is able to take my ideas and articulate them. We’re excited for our new home to be built!

We are so happy that this client not only loves her existing home, but is now building another home we designed for her and her husband. Let our designers help you make your dreams a reality. We’d be honored to work with you!


Creating Space for the Family

20RDS_blog_generations-gap-kitchen copy.jpg

After raising their children in this home, and now after weddings and grandchildren, our clients realized the size of their family had exceeded the size of what their kitchen, dining and family room could hold. Due to sheer numbers, family gatherings had become a space issue. Our clients love to cook and entertain, so the design process started in the kitchen with the idea of adding a serving bar. We opened the space, alleviated congestion and enabled the family to gather all at the same time, in the same area. 

What We Did:

  • Renovated the kitchen by installing new appliances and custom cabinetry
  • Opened the family room to the kitchen  
  • Designed and installed a custom serving bar
  • Converted 3 separate rooms into a single living space
  • Created an area large enough to enable the whole family to dine together
  • Maintained the character of the existing home while updating
  • Installed new wood flooring throughout the living area and entryway
  • Designed and installed custom built-ins and a mantel at the fireplace, along with an adjacent TV cabinet

Highlights:

  • Installed can lights into the beam over the serving bar, eliminating the need for “dropped” lighting fixtures
  • Eliminated traffic flow bottlenecks in several areas by increasing the width of the opening from foyer to family living areas and relocating the basement door
  • Installed a touchless sink faucet
  • Increased the kitchen size by capturing unused space behind existing refrigerator and oven

From our client’s vision to reality, we were delighted to exceed their expectations. They have been enjoying the comforts of their newly renovated home, as they share it with family and friends.

Dave Osmond Builders built this beautiful renovation project.

Should you Remodel or Renovate Your Kitchen?

22RDS_blog_kitchen-remodel copy.jpg

Why should you remodel or update your kitchen? At RDS, our designers are often asked about kitchens and how we can help our clients make their kitchens more efficient, updated, and current. What should you be thinking about if you are contemplating a remodel of your kitchen?

  • Is It Outdated? 
    Your kitchen may have worked for you in the past, but now it appears to be outdated. It might be in good shape, but not for your life now. Maybe the tiles are cracking or worn, the countertops are out of style, or the cabinets are broken or too small. Are the appliances old and not working for your family’s needs? It might need a new patio door, or skylights to add light to the room.
     
  • Do You Need to Change the Space or Function? 
    Counter space, cabinet space, and work space are some of the biggest reasons to update your kitchen. Most of us want more room for cooking, storage, and family work or gathering areas. You might want to increase the area so that there can be more than one cook, or to set up a computer work station. An island so that you can have a quick meal together might be a wanted change.
     
  • Are You Dreaming of a Gourmet Kitchen? 
    You love to cook, read and try recipes, and love state of the art appliances and gadgets. Your main reason for a remodel is to create your dream kitchen so that you can prepare great meals and entertain.
     
  • Is Storage or Lack of it an Issue? 
    You don’t have room for your appliances, dishes, serving ware, and pantry staples. Increasing your storage space might be the impetus for remodeling. A walk in pantry, bigger cabinets, and reworking your existing storage spaces, are all good reasons to remodel.
     
  • Do You Need the Kitchen Open to More Rooms in the House? 
    Everyone ends up in the kitchen when entertaining and if the kitchen is closed off, this doesn’t work. You might need to open up the space, build a large island, rework the flow, and create entertaining spaces.

Whatever your reasons are for remodeling your kitchen, RDS, your leader in kitchen designs and renovation plans, is here to answer your questions and work with you to design your perfect space.


Jim's Tips of the Trade…..Plan Distribution

24RDS_blog_-Jims-Tips copy.jpeg

No one would ever accuse me of being “tech savvy”, but over the past few years, I have learned a few things about PDF plan file sizes, print costs and sharing the files in the cloud. Maybe a few of these ideas could make your daily workload a little lighter.

Up until a few years ago, we printed plans and then had to run them around to subs and tradespeople to get bids and then provide everyone with new sets after the cost-driven changes were made. I know some folks are still doing it that way because “my subs don’t use computers”. They don’t use computers because you haven’t required them to join the computer age.

We find file sizes have continued to grow to the point that Gmail and some of the other servers will not accept the plans without breaking them down into separate sheets. To get around this problem we use DropBox. It is free up to a certain storage size and works like a file folder on your computer desktop. The beautiful thing about it is that you can invite your suns and tradespeople to join the folder. When you add a file to your desktop it appears in theirs. They always have the most up to date file and you don’t have to pay for prints or spend hours running plans everywhere. They’re responsible for printing their own sets for bid meetings or going paperless with an iPad or another device.

Bluebeam is an inexpensive program that PDF plans can be loaded into for use on an Ipad device that allows photographs to be taken on the job site and notes added to them along with adding notes to the PDF plans-no more rolling a set out and trying to write notes in mid-air and trying to read your scribble later. You can also send the file afterwards to everyone who needs it.

Now you’ve found a few additional hours of productive time each week and everyone you work with is instantly up to date with the latest info. Good communication can be a wonderful thing!

Jim's Tips - ARB

25RDS_blog_Tip-from-Jim copy.jpeg

One of the critical lessons we have learned over the years is the need to understand the requirements of each Architectural Review Board (ARB) we work with.  If you have a property that requires architectural review we cannot stress how important this is. Each community has distinctly different technical standards, policies, procedures and submittal requisites. 

The first step is to be certain you have the latest design guidelines and submittal requirements and that there are no other documents from other sources you need to reference. Gather this information and read through it carefully. If you have questions, ask the developer, the board or their representative before you begin design work.

There are several key questions you need to be sure you and your builder are aware and have an understanding of when building or remodeling in an ARB community:

1. What are their unique concerns?  Each community has colors, materials and a myriad of standards that must be followed. Realize the unique ones for your area and be sure to cater to those unique differences.

2. What is the impact of this design or addition on your community?  If your property is in a high profile location such at the entry or multiple sides of your home will be highly visible, you may be held to a slightly higher standard; at the very least your design will receive greater scrutiny. Understand this as the design is developed and take this into account.

3. Who is on the ARB? Are they design professionals who can visualize a home easily from 2D plans or do you need to add color or 3D views/renderings to help explain your project? Cater to the people doing the review. 

When working with a builder or remodeler, you’ll want to be sure they know and understand all of the requirements. There may be documents they need to sign also. The better everyone on the team is informed, the smoother your design approval and build process will be.

For more information on how we can help you in your next remodel, plan revision, or new home design, we invite you to connect with one of our creative team members.  We are here to help ensure great success with your project for you and your builder. Let our years of experience work for you!

Do You Understand Building Codes?

3RDS_blog_600x300-Building-Code copy.jpg

Our most recent Front Porch Friday Video dealt with building codes – the rules and regulations we must follow for any house remodel, addition or new build. Why is this important to you? At RDS, we believe that knowledge is power, and when you’re in the process of building or remodeling a home and the builder starts talking about codes, you’ll know what this means.

What is a Building Code?

The building code is a set of rules that clearly specifies all standards needed for remodeling or constructing a home. Any work done in the home must conform to the codes in order to acquire design and installation approval from the local government building department. Don’t confuse building codes with zoning ordinances, as they are usually a separate entity. 

What is the Purpose of Building Codes?

In a word, safety! Public health, safety, and general welfare as it relates to any construction. Engineers, architects, builders, and interior designers are well versed in the laws concerning building codes. Structures, electrical, plumbing, lighting, mechanicals, site drainage, and placement of stairs and halls, are just a few of the standards of structure that have to be enforced. 

A Brief History:

Building codes aren’t new. The first written code dates back all the way to 1772 BC. Even the Bible refers to building codes – parapets (barriers) had to be constructed on all houses to prevent people from falling off of a roof. Building codes have developed and changed over time, some as the result of a catastrophe or earth event. From these events and failures of buildings over time, let alone advances in our technology and innovations in building, we have learned, discovered weaknesses, and corrected issues as it relates to building.

The International Residential Code:

In the USA, we follow the International Residential Code and in Ohio, the Residential Code of Ohio is based on it. All phases of the building process, electrical, structural, plumbing, and mechanical, are affected by these rules. Designs have to conform to these codes before a building permit is granted and during the construction process, various phases of the project are inspected to certify that the proper implementation of the design, installation of materials, appliances, and systems have been adhered to. 

What to do?

Follow the rules. While at times some of the rules and regulations may seem arbitrary and difficult to deal with, don’t skirt the rules. They are rules for a reason. Be careful of working with a contractor that advises you that the work can be completed without the building department being involved. This is dangerous and could result in a fine for not having a permit, delaying the work completion. Working with certified home designers and licensed and bonded contractors provides not only peace of mind, but also a build done correctly, safely, and responsibly. 

The Building Code gives you, the homeowner, satisfaction that you are living in a safe and secure structure. At RDS, we feel very strongly about this and will always go the extra mile to do the right thing when we design your home. 

Watch our Front Porch Friday Video – Building Codes. 

The Electrical Walk-Through

6RDS_blog_Electric-Walk-Through copy.jpg

Your home is rising from the ground and you can see what is to come! The dream home you and your designer created is coming to life. At RDS, this is such an exciting time! Your design is literally appearing before your eyes. 

Now comes the time to walk your home with your contractor and electrician for the electrical walk-through. Do you know what questions to ask, what to look for, and what to do? Our latest  Front Porch Friday Video - The Electrical Walk-Through addressed this very topic. 

The Scavenger Hunt:

When you’re in the design stage with your architect, builder, or designer, walk through the house in your head. Your designer will make suggestions, and that is a good starting point. However, that’s not enough. You need to treat the electrical walk-through as a scavenger hunt. These are the first things you should consider when beginning your walk-through.

What Should You Do and Think About? 

  • Look at the blueprints while you’re walking around and discuss any issues.
  • Walk through the home carefully, completely, and with a critical eye.
  • Bring furniture measurements, measuring tape, markers, and labels, to mark and draw on the ceilings, walls, and cabinets…everywhere you might be putting something electrical. Use different colors to signify outlets, ceiling fans, recessed lights, and bathroom vent fans. Mark where furniture will be placed so you can plan for lighting needs.
  • What needs to be worked around? Are there beams that will interfere with pendant lights or recessed lighting? Will a cabinet or furniture cover an outlet?
  • Search for the switch locations. Don’t make the mistake of putting one behind a door that isn’t in place yet. Is there one available by the doorway into every room?
  • How many outlets do you need? Where are they? What do you need them for?
  • Ask about the septic system if one is being installed and where the thick wire that goes to the outside will be located (if applicable). 
  • Don’t forget about the basement, especially if you’re not finishing it yet. Think about future use.
  • Plan for exterior lighting. Walk the perimeter of the outside of your home. What types of lighting, how many outlets and switches do you need for the exterior, patio, walkways, and security? 
  • Your garage is an area that bears some thought. Do you have tools that require a 220-volt outlet? What about that electric car you’re thinking of purchasing? Or maybe just some extra outlets for the electric bike pump, leaf blower, or electric lawn mower? And don’t forget about lighting? Is one light enough or do you need to add more?
  • What do you want inside your home? Dimmer switches, 3-way switches that work lights independently from one place, and double, triple or quadruple-gang boxes in places where many things will need to be plugged in…like in a bedroom (baby monitor, phone, computer or tablet, etc.) are important considerations to make.
  • Outlets, outlets, outlets. Will the placement of them be vertical, horizontal, high on walls t keep them out of little hands, in the floor for a light behind the couch? 
  • Where is the breaker box?

You’re the One Living Here:

You’re completing the walk-through, you’ve looked at the blueprints, you’ve marked up the walls and ceilings, but is all of the above enough? You’re the one living here. So, now go through it again in your head and imagine yourself in the home after it’s completed and you’ve moved in. It’s easier and less expensive to make any changes now instead of after the work is completed.

  • You’ve marked all of the switches so now walk through your home and reach for lights going in and out of every room. Did you get them all? Are they accessible for everyone in your family?
  • Look at the lighting again. You’ve got the recessed lighting, chandeliers and pendant lights. But do you have plans for outlets and switches needed for additional floor lamps or table lamps?
  • What amps will you need for what appliances? Ask questions. Are you going to want a generator? Extra refrigerator or freezer? Is this in the plan?
  • Where do you want cables for TV and the Internet? Now is the time to think beyond the obvious places and really become your family living in the home. 
  • Think about furniture placement. Will you have nightstands by the bed? Are you using bunk beds and want a switch or outlet by the upper bunk? Where is the furniture? Will there be outlets available nearby or will they get covered up?
  • What are your needs in the office area?
  • Outlets need to be at the correct height and in a place they aren’t obtrusive, like the ones placed by our clients in the video on the back of the cabinet. Some people don’t want to place outlets in the middle of backsplashes, so thinking those things through now will save you future headaches!
  • Where are you going to put an ironing board? The laundry room is obvious, but many people are putting one inside a large master closet…which is a perfect place to put an outlet, right?
  • Where do you need USB ports?
  • Do you have an open floor plan? Do you need outlets on the floor to go behind a couch?
  • Under or above cabinet lights? Many homeowners want to have soft lighting for evening ambiance, outlets for decorative lighting above cabinets, or directed lighting for prep. 
  • Do you want to have lights near or on a mantel? You certainly don’t want cords hanging off of the mantel. This is a thought for any TVs placed above the mantel, too.
  • Do you want some automated lighting, such as in a pantry, closet, or garage?

The electrical walk-through should be detailed, informative, and inspiring for you! Take your time during the walk-through and be sure you, your contractor, and electrician have thought of everything. Our designers at RDS love helping you light up your life when designing the home of your dreams!